Clear-com HX System Frames Uživatelský manuál
Procházejte online nebo si stáhněte Uživatelský manuál pro Příslušenství komunikace Clear-com HX System Frames. Clear-Com HX System Frames User Manual Uživatelská příručka
- Strana / 86
- Tabulka s obsahem
- KNIHY


- Document Reference 2
- Legal Disclaimers 2
- Clear-Com Contacts 2
- Contents 3
- Safety symbols 7
- Mains power cord 7
- 2 Introduction 8
- 2.2 Further information 9
- 3 Installation Overview 10
- Wiring schemes 11
- Important note: 12
- 3.2.2 Installing the cabling 14
- I-Series panels 15
- Checking the matrix frame 18
- 4 Locating System 20
- Components 20
- Eclipse HX-Delta 21
- 4.2.1 IMF-3 interface frame 22
- IMF-3 rear panel 23
- 4.3 Locating user panels 24
- 5.1 Powering matrix frames 26
- 5.1.2 Eclipse HX-Delta 27
- 5.1.3 Eclipse HX-PiCo 27
- 5.2 Powering user panels 28
- PSU-101 alarm 29
- 5.3.2 IMF-102 30
- 6 Wiring System Components 31
- 6.1.1 Cabling standards 32
- Eclipse HX-PiCo 36
- Production Maestro Pro 39
- DB-25M connector 43
- DB-25F connector 45
- Opto-isolated mode 46
- Non-isolated mode 47
- External audio devices 57
- Call Signal Input 57
- Relay Contacts 57
- (including Encore) 58
- 7 Connecting Matrix Frames 71
- PiCo-Link 74
- 7.4 E1 / T1 linking 75
- 7.4.1 E1 trunk connections 76
- 7.4.2 T1 trunking 79
- 7.5 Fiber-optic linking 81
- System #1 System #2 System #3 83
- System #4System #5 83
- Primary ring 83
- Secondary ring 83
- 8 Glossary 84
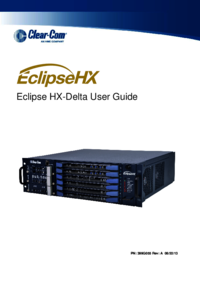
Shrnutí obsahu
Matrix Frame Installation Guide PN: 399G042 Rev: A 03/22/2013
3 Installation Overview This chapter provides a basic overview of the installation process for an Eclipse HX system. The system described in this ch
3.1.2 Select locations for the system components Select locations for the Eclipse HX matrix frame, interface cards, interface modules, user panels,
The Eclipse HX-Pico uses a special null modem DB9 to 3.5 TRS. The HX-Median / HX-Omega /HX-Delta CPU card uses a straight serial cable. If the EHX
appropriate interface input connector on the interface frame (IMF-3). For more information, see 6.11 Connecting to interface modules. External alar
Tip: For detailed information about installing a particular matrix (matrix frame) or interface frame in the rack, see the appropriate guide in the E
I-Series panels I-Series panels have internal power supplies, with removable AC power cords. The power supplies are universal, operating over a volt
3.3.2 Minimum PC requirements (for EHX software) Specification Description / Value Processor 1 GHz Memory 1GB RAM Hard disk 1GB minimum 32 bit, 2
3.3.3 Recommended PC requirements (for EHX software) Specification Description / Value Processor 2GHz or greater for a client. As many cores as p
Checking the matrix frame Eclipse HX-Omega, HX-Median and HX-Delta The LEDs on the front of the CPU card indicate its operational status:
Tip: For more information about the lights and controls on the CPU card, see either: • The Eclipse HX-Omega User Guide. • The Eclipse HX-Median Us
Document Reference Eclipse HX Matrix Frame Installation Guide Product Number: 399G042 Revision: A Legal Disclaimers Copyright © 2013 HME Clear-
4 Locating System Components This chapter provides help with deploying (locating and arranging) the principal components of your Eclipse HX system
4.1.1 Locating the Eclipse HX-Omega, Eclipse HX-Median and Eclipse HX-Delta The Eclipse HX-Omega and Eclipse HX-Median matrix frames each require si
4.1.2 Locating the Eclipse HX-PiCo The Eclipse HX-PiCo matrix (matrix frame) requires one vertical rack unit (1RU) (1.75 in. or 44.45 mm) in a st
PSU-101 power supply for the IMF-3 The frame uses an external PSU-101 rack-mounted power supply to supply power to the interface modules. A second P
Environmental information: An extra rack unit (1RU) (1.75 in. or 44.45 mm) must be left above and below each external power supply unit. This enable
You can also connect the external computer to the matrix frame using a standard PC serial port to DB-9 RS-232 connector. The maximum recommended le
5 Powering System Components This chapter provides guidance for providing power to the following components of the Eclipse HX system: • Eclipse H
5.1.1 Eclipse HX-Omega and Eclipse HX-Median The Eclipse HX-Omega and HX-Median matrices (matrix frames) are supplied with two internal Euro Casset
5.2 Powering user panels 5.2.1 V-Series panels V-Series panels, including expansion panels, have an external DC power supply. The power supply is u
Figure 7:Example PSU-101 to IMF-3 connections Installing two PSU-101 power supplies for each IMF-3 provid
Contents 1 Important Safety Instructions ... 6 Safety symbols ...
5.3.2 IMF-102 The IMF-102 has an internal power supply and a rear panel connector for connecting redundant power. The power supply is universal, ope
6 Wiring System Components This chapter describes how to connect an Eclipse HX matrix frame (Eclipse HX-Omega, Eclipse HX-Median, Eclipse HX-Delta o
6.1.1 Cabling standards The term category 5 (CAT5) refers to a communications cable standard that calls out transmission characteristics of twisted-
Tip: Test all cables thoroughly before connecting them. 6.1.2 Recommended cables, connectors and wiring tools Ensure that the type of RJ-45 conne
The detailed procedure is as follows. To facilitate the installation of RJ-45 connectors: 1. Strip off enough of the outside vinyl jacket to be ab
6.2 Connecting the matrix frame to a PC running EHX The Eclipse configuration software (EHX) application is run on a PC. 6.2.1 Ethernet connection t
Eclipse HX-Median, Eclipse HX-Omega and Eclipse HX-Delta To connect the EHX PC to the matrix frame, run cable from the matrix’s R-232 DB-9M serial c
Figure 9: Pin connections for PC DB-9F to Eclipse HX-PiCo 3.5mm jack PC Connection (DB-9F) Eclipse HX-PiCo (3.5mm
6.3 Connecting the matrix frame to an Ethernet network To connect a matrix frame to an Ethernet network (WAN / LAN), use: • The LAN1 connector (a s
6.4 Connecting the matrix frame to a PC running Production Maestro Pro Production Maestro Pro is the is a multi-user, multi-matrix PC based software
5.1 Powering matrix frames ... 26 5.1.1 Eclipse HX-Omega an
Figure 10: 4-Pair analog wiring, matrix frame to panel 40 Eclipse HX Matrix Frame Installation Guide
6.6 General Purpose Outputs (GPOs) A general purpose output (GPO) or relay is a switch that is controlled remotely.The relay is programmed in EHX to
DB-25M Connector Pin Description Relay Pin 1 Common RELAY1 Pin 2 Normally closed Pin 3 Normally open Pin 4 Common RELAY2 Pin 5 Normally closed Pin
Figure 11: Pin configuration of the GPO connector (DB-25M) Note: The general purpose outputs are single-pole
6.7 General Purpose Inputs (GPIs) You can connect an external logic device (such as an external foot switch, a panel-mounted switch, or the logic ou
Pin 24 V IN - Pin 25 V IN - Table 13: Pin connection General Purpose Inputs, DB-25F connector
6.7.1 Modes for General Purpose Inputs (GPIs) General-purpose inputs (GPIs) operate in either of two modes: • Opto-isolated mode, which requires th
Non-isolated mode Note: The non-isolated mode is the default mode, when the matrix frame leaves the factory.
6.8 E & M signalling with an E-QUE E1 / T1 interface card When you enable E & M signaling on an E1 / T1 direct E-QUE card, you associate a G
In Figure 15: Ship-to-Shore E & M signaling, E & M signaling is carried with audio channels on the direct T1 connection and then split into
6.11.1 Wiring schemes for the FOR-22 interface module ... 56 6.11.2 Wiring schemes for the CCI-22 interface
4. Click Card Properties (to the right of the ports screen). 5. In Card Properties > Clock Recovery, ensure that Line recovery is selected. 6
6.8.3 Using the GPIs / GPOs to trigger actions After enabling E & M signaling on the E1 / T1 E-QUE cards, you can use the GPIs / GPOs associate
d. Label the second control REC1. e. Add the Radio In route to REC1. f. Add the E & M relay / GPO (the relay associated with the first conf
6.9 Connecting the matrix frame to an external alarm You can connect the Eclipse HX-Omega / Eclipse HX-Median / Eclipse HX-Delta matrix frame to an
6.10 Connecting to a four-wire audio device An external four-wire audio device can be directly connected to a port connector through the four audio
The following figure shows the pin assignments of RJ-45 connectors when used to connect to interface frames (such as an IMF-3 frame):
6.11.1 Wiring schemes for the FOR-22 interface module Figure 20: Pinout of DB-9M I/O connector for FOR-
A FOR-22 interface connects to an Eclipse HX matrix frame through the two RJ-45 connectors on its rear panel. The top RJ-45 is for the first channe
6.11.2 Wiring schemes for the CCI-22 interface module The CCI-22 interface module connects two 2-wire full-duplex partyline circuits to the matrix
Key to Figure 19: DB-9M interface I/O connector for CCI-22 Connector Description A Channel #1: Pin 1 = Clear-Com / RTS Pin 2 = Ground Pin 3 = +30 V
1 Important Safety Instructions 1. Read these instructions. 2. Keep these instructions. 3. Heed all warnings. 4. Follow all instructions. 5.
6.11.4 Wiring schemes for TEL-14 interface modules The TEL-14 telephone interface module connects two telephone lines to the matrix frame (matrix0.
Key to Figure 19: Wiring an IMF-3 rear panel to a TEL-14 interface module Connector Instruction / description A The upper DB-9M connector is used t
Key to Figure 20: Wiring an IMF-102 rear panel to a TEL-14 interface module Connector Instruction / description A DB-9M connector. Connects to the
Figure 24: RJ-11 to DB-9 Adaptor for TEL-14 Interfaces Note: The TEL-14 interface works with telepho
6.11.5 Wiring scheme for the RLY-6 interface module The RLY-6 interface module provides six fully programmable SPDT (single pole, double throw) rel
Figure 25: RLY-6/GPI-6 Daisy Chain Connection Note: If both GPI-6 and RLY-6 interfaces are used
Wiring external devices to an RLY-6 interface module To connect external devices to an RLY-6 interface module, use the two DB-9M connectors on the r
F #1/4 COM G #2/5 Normally closed H #2/5 Normally open I #3/6 COM Table 18: Key to Figure 23: RLY-6 DB-9M
Wiring the GPI-6 to the IMF-3 interface frame To connect the GPI-6 to the matrix frame: 1. Connect one end of an RJ-45 cable (eight wires with no
Figure 27: GPI-6 interface DB-9M connector pinout Key to Figure 24: GPI-6 DB-9M connector pinout Co
Safety symbols Familiarize yourself with the safety symbols in Figure 1: Safety symbols. These symbols are displayed on the apparatus and warn you o
Figure 28: GPI-6 interface module examples Figure 28 shows you how to connect switches or contacts using the power source provided by the GPI-6 mo
7 Connecting Matrix Frames You can connect your Eclipse HX matrix frames together, to expand the geographical range or the port density of a syste
7.1.1 Intelligent linking with trunk lines As many as 15 separate Eclipse HX-Omega, Eclipse HX-Median, Eclipse HX-Delta and Eclipse HX-PiCo matrix f
The matrix is connected to an Ethernet network with the RJ-45 sockets labeled: • LAN 1 and LAN 2 on the rear of the Eclipse HX-Omega, Eclipse HX-M
Pin Description Pin 1 Transmit data + Pin 2 Transmit data - Pin 3 Receive data + Pin 4 Unused Pin 5 Unused Pin 6 Receive data - Pin 7 Unused Pin 8
Tip: The matrices are configured for linking using EHX. For more information, see your EHX documentation (including EHX Help). 7.3 Tie-line (audio
7.4.1 E1 trunk connections You can use the E-QUE interface card to make E1 connections between Eclipse systems or between Eclipse systems and compat
Figure 32: Matrix to Matrix direct E1 Trunking E1 trunking between matrices can also be achieved over an E1 network, as shown Figure 30: E1 Trunk
Figure 33: E1 Trunking with an E1 Network The E-QUE interface can also be used to connect the matrix to third party equipment using E1 port 1 or 5
The CAT5 cable connecting the E1 port on the E-QUE rear card may be a crossover cable or a straight-through cable depending on the requirements of t
2 Introduction The Matrix Frame Installation Guide describes the steps required to install and configure an Eclipse HX matri
Figure 35: Matrix to Matrix T1 Trunking T1 trunking between matrices can also be achieved over a E1 network as shown in Figure 33: T1 Trunking us
Figure 36: T1 Trunking using a E1 Network E1/T1 trunking failover Where the E1/T1 trunking has been configured with redundant trunks audio will be
Each fiber card link comprises: • A front card with status indicators. • A rear card with two Duplex LC terminated fiber optic connectors (TXVRA
Figure 37: Fiber optic connected matrices (matrix frames) TX2- E-FIB card#1 - RX2TX2- E-FIB card#1 -
8 Glossary Term Definition Analog Port Any of the Eclipse HX matrix’s analog input/output RJ-45 connectors that are used to connect cable from t
Fiber optic cable A fiber-optic cable consists of a glass core covered with a reflective material called cladding and several layers of buffer coati
Non-volatile Memory Data stored in the CPU’s firmware (ROM) that is not lost when the power is turned off. Palette The port, keyGroup and Monitor s
7 Connecting Matrices (Matrix frames) Provides information on connecting different matrices (matrix frames) together. Table 1: Chapters s
Další dokumenty pro Příslušenství komunikace Clear-Com HX System Frames




Související produkty a manuály pro Příslušenství komunikace Clear-com HX System Frames
 (143 stránky)
© 2020, manymanuals.cz. Všechna práva vyhrazena. | 0.027 s |
 Manymanuals.com
 Manymanuals.de
 Manymanuals.fr
 Manymanuals.it
 Manymanuals.pl
 Manymanuals.cz
 Manymanuals.es
 Manymanuals-pt.com
Komentáře k této Příručce